
How-to
Cleaning coffee gear: brewers, grinders and espresso care
Daily rinse versus deep cleans for drippers, presses, espresso and grinders.
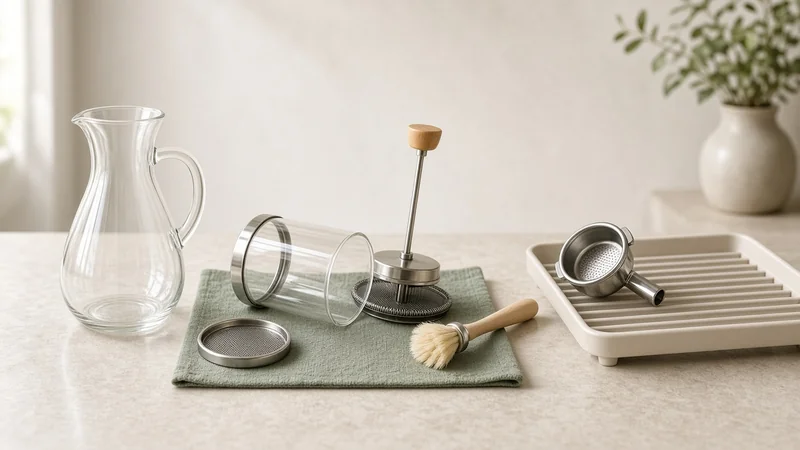
Rinse after every brew, descale heated machines on the maker’s schedule, and brush grinders instead of soaking them.
- Rinse organics daily; oils go rancid.
- Follow maker descaling for heated machines.
- Do not put most grinders in the dishwasher.
Brewers by type
Drip: clean basket, showerhead deposits, carafe interior. Pour-over: rinse drippers and discard old papers. Press: disassemble mesh. Capsule: run maker rinse cycles.
Espresso: wipe group area, backflush if supported, purge wands. Follow the machine’s own cleaning procedure.
Safe chemicals
Use food-safe cleaners meant for coffee equipment when possible. Rinse obsessively. Keep descalers and milk detergents labeled.
Wood, plastic and glass care
Wood handles dislike dishwashers. Glass thermal-shocks. Plastics stain with oils — wash sooner rather than later.
Smell test
If gear smells like old nuts or sour milk, clean before brewing again. Flavor defects often start as hygiene defects.
Why cleaning changes flavor
Old oils oxidize and coat burrs and chutes. New coffee picks up rancid notes even when grind settings are perfect.
Dark oily beans dirty grinders faster than light dry beans. Adjust cleaning frequency to what you actually grind.
Maker manuals from brands like Baratza show model-specific disassembly — follow those diagrams over generic videos when they conflict.
Daily and weekly habits
Daily: unplug before brushing loose grounds from an accessible chute, then wipe the bin and empty residual grounds.
Weekly: brush burr surfaces you can reach with power unplugged. Never put motor housings in a sink.
Avoid water on electronics. Some grinders allow upper burr removal for access — only if the manual says so.
Deep cleans and tablets
Grinder cleaning tablets exist for some workflows; confirm compatibility. They are not a substitute for brushing visible oils.
After deep cleans, purge a small amount of coffee and discard it before brewing a cup you care about.
What not to do — deeper notes
- Do not wash sealed motors
- Do not bend burrs prying with knives
- Do not run wet beans
- Do not ignore stones — they chip burrs
Replacement burrs are normal wear items on busy grinders.
Scale is a mineral problem
Heating hard water leaves carbonate scale in boilers, thermoblocks, kettles and shower screens. Flow slows, temperature drifts and parts fail early.
Descale with the agent your maker allows. Vinegar is not universally approved and can damage some seals or leave taste — read the manual.
Water strategy reduces how often you descale — Water for coffee: why it matters and EPA drinking water basics.
How to think about intervals
Maker lights and cup counters are starting points. Very hard water needs shorter intervals; soft filtered water stretches them.
White crust on kettle spouts is a visible clue your espresso machine is also collecting scale.
Backflushing three-way valves
Some espresso machines with three-way solenoids support backflushing with a blind basket and detergent to clean the brew path. Not all machines should be backflushed — check the manual.
Water-only backflushes differ from detergent cycles. Rinse thoroughly after detergent.
Milk systems are separate
Descaling does not replace daily milk cleaning. Frother carafes and wands need immediate rinses.
Safety and warranty notes
Use correct dilutions. Do not mix random chemicals. Unplug where instructed. Keep descaler away from children and finishes it can etch.
Document the date you descaled; future you will forget.
Aftercare tasting
Run plain water cycles after descaling until taste is neutral. Discard the first coffees if any off-flavors remain.
If mineral deposits return quickly, consult Water for coffee: why it matters before changing the cleaning schedule.
Identify the residue before choosing the cleaner
Brown oily film and pale mineral crust are different deposits. Detergent intended for coffee oils is not automatically a descaler, and an acid used to remove scale is not a universal cleaner for a grinder or milk system. Match the product, concentration and contact procedure to the component and maker instructions.
Remove detachable parts only as directed. Keep electrical bases and motor assemblies out of water. When a manual says a part is dishwasher-safe, check whether that applies to the whole assembly or only a removable jug or filter. Wood collars, painted surfaces, seals and aluminum parts can have different limits even when they belong to the same brewer.
Verify the result before the next beverage
After the prescribed cleaning and rinsing cycles, inspect the water and smell the clean vessel without coffee masking the result. If detergent aroma remains, do not try to cover it with a stronger dose of beans. Complete the maker’s rinse instructions and confirm parts are correctly reassembled before brewing again.
A new leak or abnormal noise after cleaning is a reason to stop and review the assembly. For grinders, a misseated upper burr can alter the setting range. For a press, a loose filter stack can let grounds bypass the screen. For espresso, a displaced seal can leak at the group. Cleaning should restore the intended function, not introduce a new fault that is accepted as normal.
FAQ
Dishwasher safe?
Only parts the manual lists. Heating bases and grinders usually stay out.
Baking soda OK?
Mild abrasives can help carafes; avoid scratching nonstick or soft plastics.
How fast does milk spoil on wands?
Fast — purge and wipe immediately.
Next step
After practicing Cleaning coffee gear: brewers, grinders and espresso care, use the brew matcher only if you still need a gear class.
Spec notes for Cleaning coffee gear: brewers, grinders and espresso care are compiled from maker docs and public references — not a hands-on review. Confirm live specs before buying.